Stefan’s Volksplane Construction Log
Firewall and Sternpost
April 4, 2007
Continued from Fuselage Construction: Main Bulkheads.
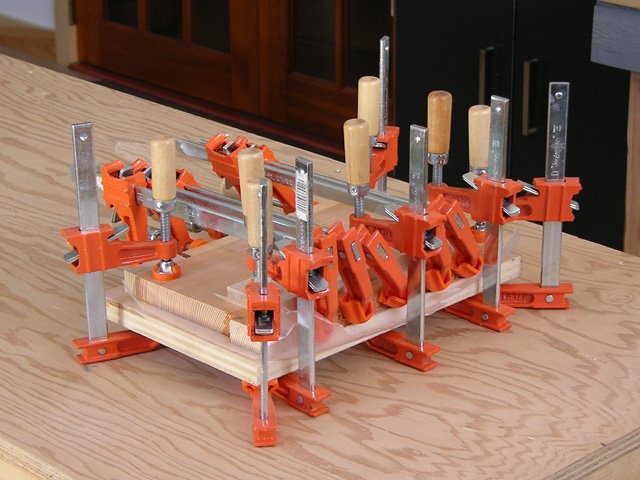
2007-Jan-19: The Volksplane’s sternpost is made from a piece of 5-3/4″ x 10-1/4″ x 3/4″ quarter-sawn Douglas fir sandwiched between two layers of 1/8″ plywood. Unfortunately, I didn’t have a wide enough piece of fir, so I laminated two pieces together. To keep the resulting board flat, I clamped it to a piece of plywood (protected with wax paper) while the glue cured.
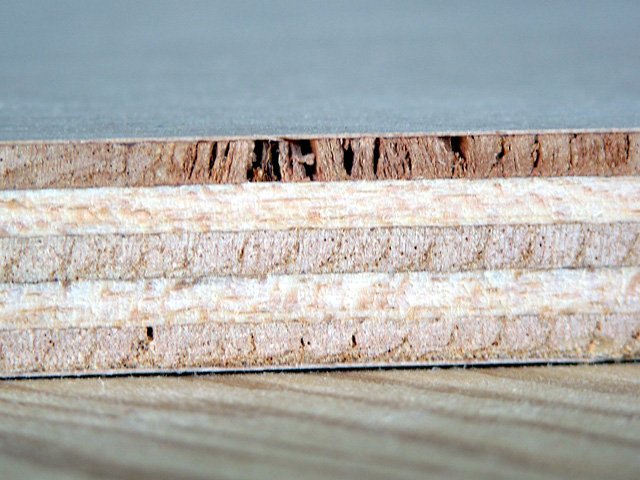
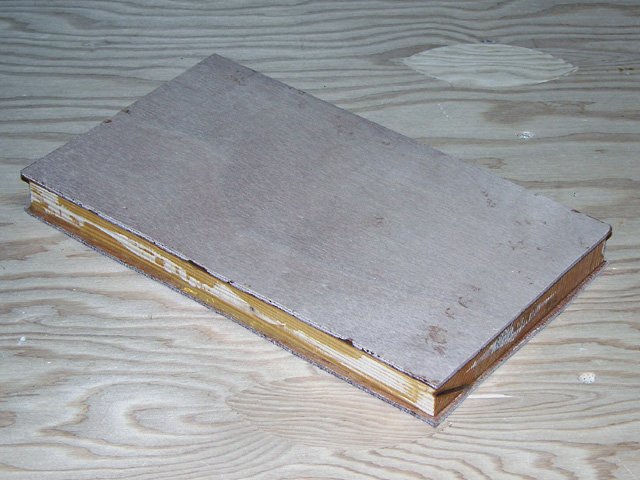
I also cut a piece of 3/4″ supposedly marine grade plywood for the firewall, but the material I selected turned out to be no good. It consisted of very thin (maybe 1/64″) okoume veneer, with five plys of a very soft, light, and crumbly wood. There were a lot of voids, as you can see in the photo. I’m not sure how this can be called “marine grade”, but it was stamped as such.
2007-Jan-31: After determining that the first piece of firewall material was inadequate, I purchased a sheet of 3/4″ exterior grade (one of two choices in the plans) fir plywood for a second try. I once again carefully measured this and cut it to size.
Next, I trimmed the sternpost fir piece to its pre-bevel size of 5-3/4″ x 10-1/4″. I also cut a pair of 1-1/8″ x 3/4″ x 15-1/2″ firewall-to-fuselage blocks from a length of 1″ x 2″ Douglas fir I found at a local wood specialty shop (Snider Plywood Specialties, which carries far more than just plywood). I cut these blocks so that the end grain would “connect” the firewall and fuselage sides.
2007-Feb-01: Today I glued 1/8″ marine plywood facing on the front and back sides of the sternpost, using plenty of epoxy, and clamped the assembly between two flat boards.
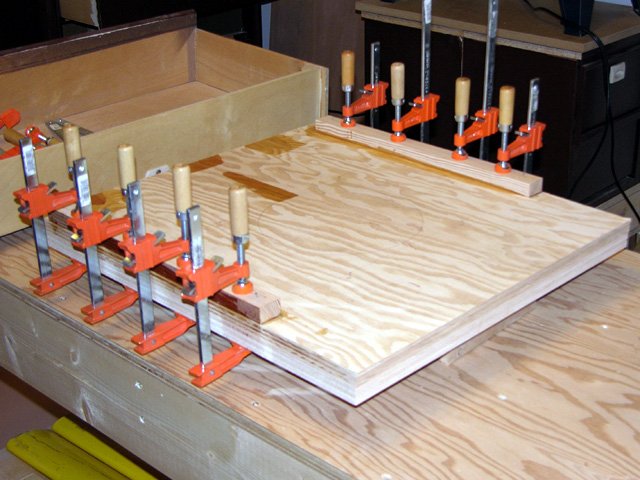
After setting that aside to cure, I prepared the firewall-to-fuselage blocks for gluing. To do this, I first carefully clamped them in their precise positions, marked the locations of the bolt holes, and predrilled the holes using a 3/32″ drill bit. I then tapped 3/32″ thick smooth nails (which were a snug but not tight fit) through three of the holes in each block. I could then glue the blocks in place and not worry about them shifting around as I tightened the clamps. After about twelve hours, when the epoxy was almost completely cured, I pulled the nails out while still leaving the clamps for another twelve hours or so.
2007-Feb-04: My clamping job on the firewall blocking wasn’t good enough. There were some spots where a thin piece of paper could be slid between the firewall and block, albeit not very far. I decided to try to force more epoxy into this gap, using a heat gun to thin it so it would flow. In the back of my mind though, I was already thinking that I’d probably have to start over.
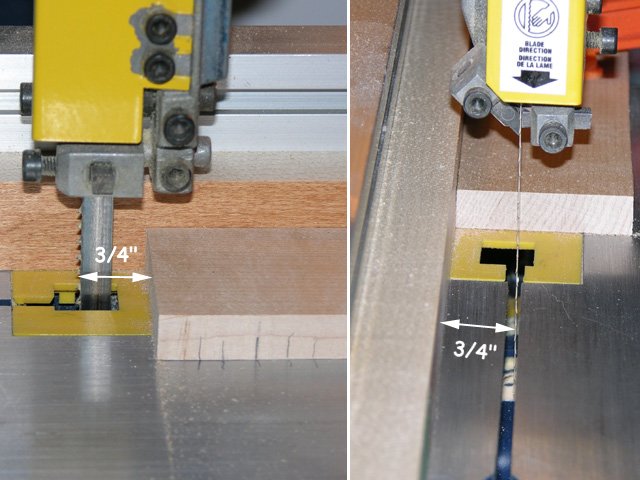
On the productive side, I trimmed, bevelled, and notched the sternpost assembly. To trim it, I used a router mounted in a router table, with a flush trim bit. Bevelling the side and top edges was done on the bandsaw, with the table tilted the appropriate number of degrees. Notching was done the same way as notching the main bulkheads (see this photo and description), except with the table tilted to the appropriate angle.
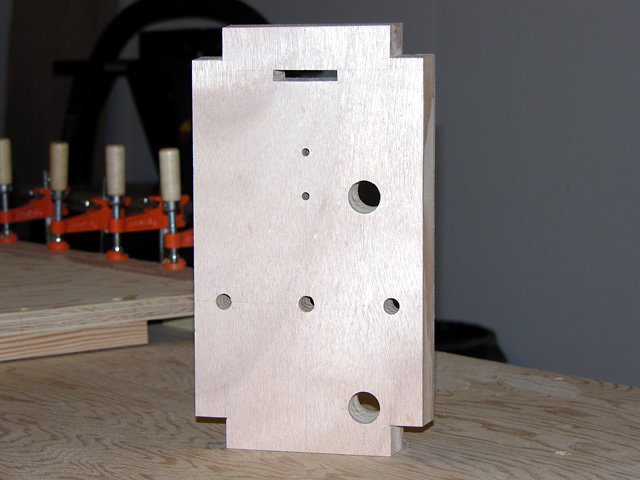
I also drilled the 3/8″ and 3/16″ holes that are perpendicular to the surface of the sternpost, using brad point bits to make clean cuts through the plywood surfaces. The sharp points on these bits also make it easy to centre the drill exactly on intersecting pencil lines.
2007-Feb-07: There were still gaps in the firewall block joints, so I attempted to force more glue in. I think this is the airplane building equivalent of “throwing good money after bad”.
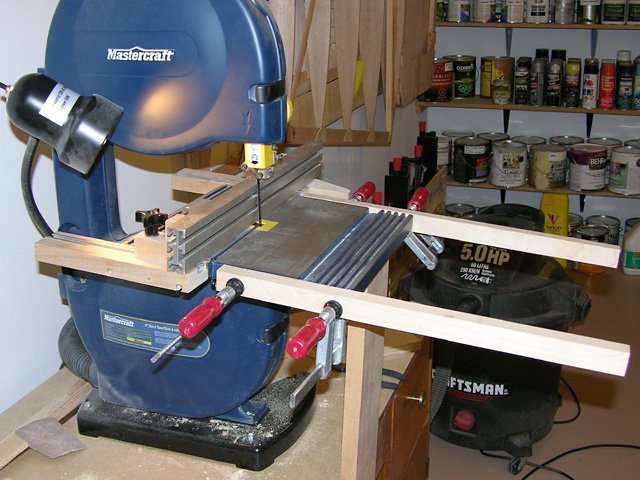
2007-Feb-21: Still stubbornly refusing to give up on the second firewall, I bevelled the firewall sides. Like the sternpost, I used the bandsaw to do this, but I had to clamp extensions onto the bandsaw table in order to support the plywood as I fed it through the saw.
Next, I drilled the 3/16″ holes for the attachment bolts and countersunk them with a separate countersink bit. The problem with this approach is that the countersink bit can wander, resulting in a countersink that isn’t concentric with the hole. If it’s significantly off centre, it will unduly stress the bolt head. I decided I’d purchase a proper combination drill-bit and countersink cutter and rebore the countersinks later.
2007-Mar-01: Today was the end of the line for this firewall. I noticed that it was significantly bowed vertically, which was part of the reason it was so difficult to clamp the Douglas fir blocks to it evenly. I decided to throw it out and start over.
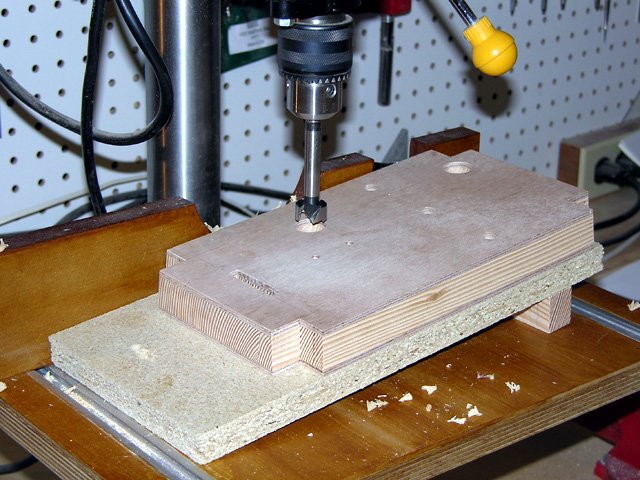
As far as real work goes, I drilled the angled holes in the sternpost, including a row of 1/4″ holes that I then chiseled out to make the landing gear spring slot. To achieve the proper angle, I constructed a simple jig to place on top of my drill press table. This consisted of a 14″ long piece of particle board with a 1-1/8″ wide block glued to it 10.7″ from one end (since arctan 1.25/10.7 = 6°, the desired angle).
The finished sternpost is a thing of beauty, if I do say so myself.
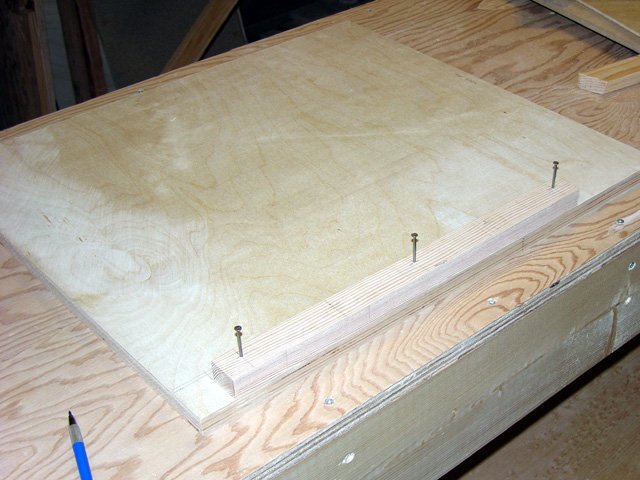
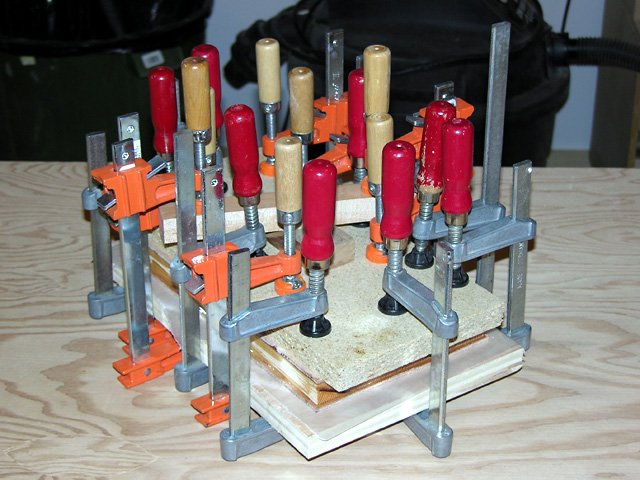
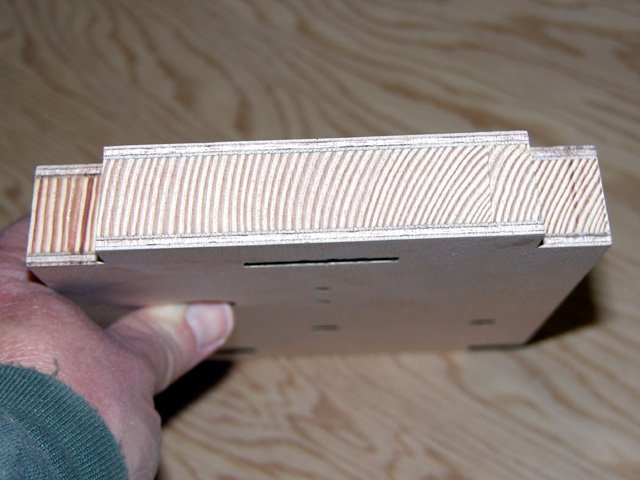
2007-Mar-24: Another day, another firewall. Today I started on a brand new firewall, using a piece of top-notch waterproof 3/4″ 13-ply Baltic birch plywood. This is the same stuff used as flooring in some European horse trailers. I love the material and the name has a nice ring to it as well. I also cut two new pieces of Douglas fir firewall-to-fuselage blocking. In the photo, you can see it with alignment nails in place (as described for the previous firewall attempt), ready for gluing, which I proceeded to do.
2007-Mar-25: After the glue had cured, I use a chisel and hand plane to remove the excess glue so that I’d have a flat edge to run along the bandsaw fence. I then used the bandsaw to cut the 4-1/2° bevel in each side and the 3-1/2° bevel along the top edge. I also began pondering how to cut the rounded corners so that they smoothly transitioned from 4-1/2° to 3-1/2°, and posed that question to the Volksplane discussion group on Yahoo.
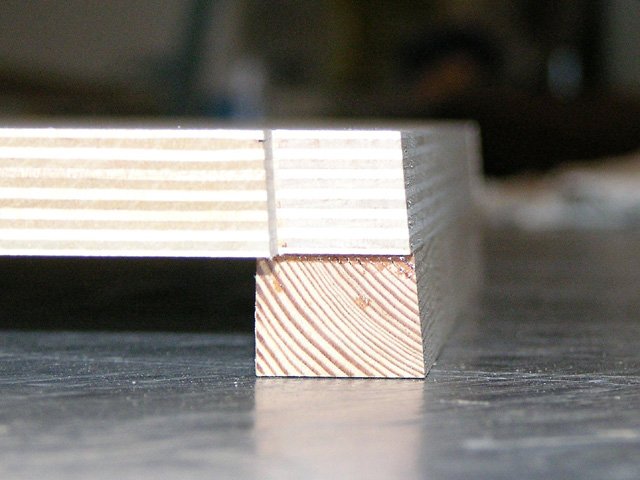
Notice in the photo that the end grain of the block is diagonal, forming lines that will connect the firewall to the fuselage sides. If the grain went the other way, the wood could easily split along the joint.
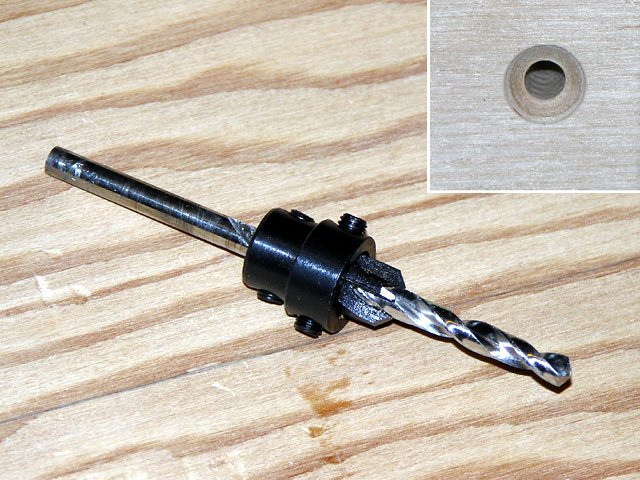
2007-Mar-28: I purchased a set of combination bit-and-countersinks in order to obtain one that could take a 3/16″ bit and didn’t counterbore the top part of the hole (intended for the unthreaded part of a wood screw). It seems that there’s no standard for what size bit is used for a given screw size. In the set I purchased, it’s the #9 size that uses a 3/16″ tapered bit. I replaced the tapered bit with a straight bit and drilled the bolt holes, using the depth stop on my drill press to ensure the bolt heads would sit flush with the firewall surface. The result: perfectly concentric holes and countersinks.
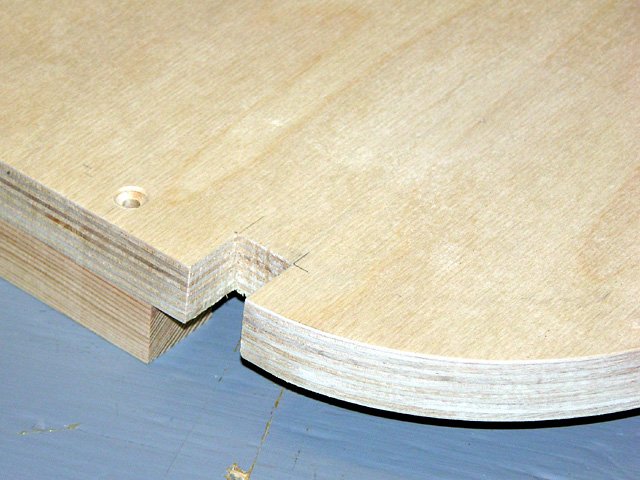
Also today, I notched the firewall corners and sides, using the techniques described above for the sternpost, and previously for the main bulkheads.
2007-Apr-04: I finally decided to cut the rounded corners of the firewall by cutting them at a 4-1/2° angle while following a line drawn on the forward face. This would leave some excess material where the angle should be less than 4-1/2°, which I’ll sand off later when fitting the forward upper surface.
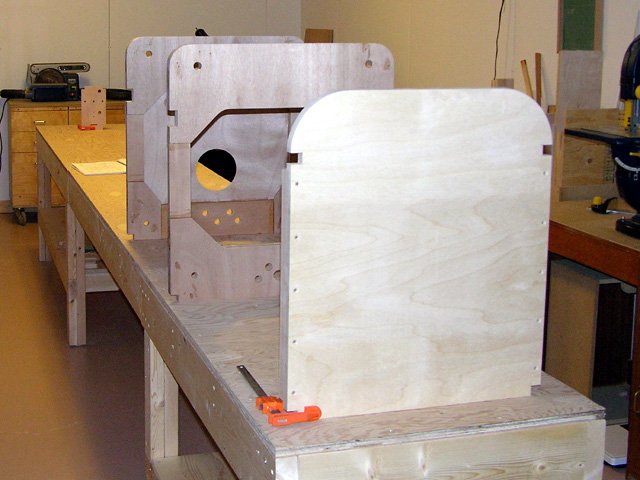
Just for the sense of accomplishment, I set up all the bulkheads in their approximate relative positions (except the sternpost, the top of which should be in line with the top notches of all the other pieces). It took some imagination to fill in the rest of the airplane.
Continued at Fuselage Construction: Sides.
![]()
![]()
![]()
![]()
![]()
![]()
![]()
![]()
![]()
![]()
Disclaimer: Although every effort has been made to ensure accuracy and reliability, the information on this web page is presented without warranty of any kind, and Stefan Vorkoetter assumes no liability for direct or consequential damages caused by its use. It is up to you, the reader, to determine the suitability of, and assume responsibility for, the use of this information. Links to Amazon.com merchandise are provided in association with Amazon.com. Links to eBay searches are provided in association with the eBay partner network.
Copyright: All materials on this web site, including the text, images, and mark-up, are Copyright © 2026 by Stefan Vorkoetter unless otherwise noted. All rights reserved. Unauthorized duplication prohibited. You may link to this site or pages within it, but you may not link directly to images on this site, and you may not copy any material from this site to another web site or other publication without express written permission. You may make copies for your own personal use.
anderson
January 30, 2011
boa noite pode mandar o projeto gratis?