Black Lagoon: An Homage to the Tudor Heritage Black Bay
March 14, 2014
The many offerings from Rolex, especially the popular Submariner, have never really appealed to me. The so-called “Mercedes” hour hand looks out of place on what is essentially a tool watch, and there are so many Sub look-alikes out there, that there’s little to differentiate the real thing (other than price, possibly quality, and of course the name).
Rolex subsidiary Tudor’s offerings weren’t much more appealing. The “snowflake” hour hand, although an improvement over that of the Rolex, didn’t really strike a chord with me either, and the large square hour markers made the watch look somewhat cheap. Their watches are however a little more unique, simply because they are less commonly copied.
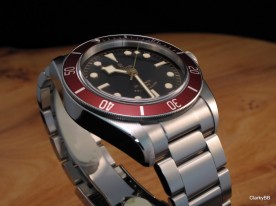
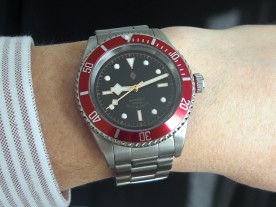
The Tudor Heritage Black Bay. Photo courtesy of Watchuseek member “clarky”.
Then, Tudor released the Heritage Black Bay. Combining a Submariner case, maroon coloured bezel, Rolex style dial with rose-gold framed markers, and lumed rose-gold hands, they have produced a watch that I actually like. But not at a $3500 price tag.
With the success of my Omega X-33 homage, I decided to try my hand at creating an homage to the Black Bay. In some ways, this would be a simpler project due to the ready availability of a suitable dial, hands, and bezel insert. On the other hand, the metal work involved in doing it right would provide a new challenge.
Foundation
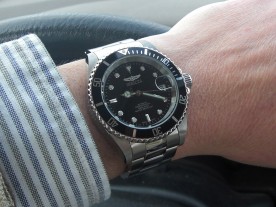
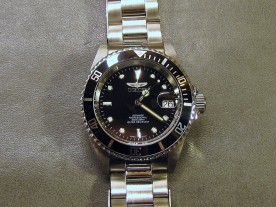
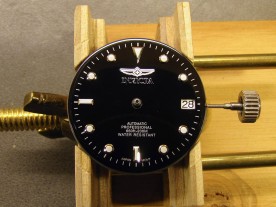
As a starting point, I chose the Invicta 8926OB. This is a popular watch from an unpopular (among watch enthusiasts) company, and is a very good look-alike of the classic Rolex Submariner. Note that it is a look-alike, not a fake. It is clearly marked “Invicta”, not “Rolex” or “Tudor”, and has a large gaudy set of wings where Rolex would display their subtle crown logo.
Invicta is notorious for poor quality control and terrible customer service. If your watch arrives defective, Invicta wants you to send it to them, along with a cheque for $28, after which it takes a month or two to get the watch back. If you’re lucky, they will have fixed it. I recommend purchasing from a retailer like Amazon, which has a no-hassle exchange policy. I’m glad I did, as the first watch I received was defective (the hairspring passed outside the regulator pins, resulting in a watch that was losing 4 minutes per day and could not be adjusted).
What makes this Invicta a good foundation is the low price ($82 when I purchased it), and that it is equipped with the Seiko NH35A automatic movement, which both hacks (the second hand stops when the crown is pulled out to set the time), and can be hand wound. Because it is a Seiko movement, aftermarket parts designed to fit Seiko watches can be used in the Invicta.
Building a thorough homage to the Black Bay requires a little more work than just exchanging the dial, hands, and bezel insert though. There is a rather large “Invicta” logo etched into the left side of the case, and unlike the Black Bay, the 8926OB case has raised guards protecting the winding crown.
Disassembly
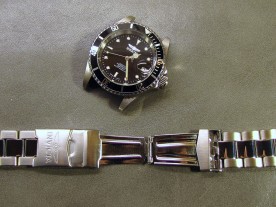
The Invicta bracelet is similar in style to that of the Black Bay, except that the former has polised centre links, whereas the latter is fully brushed. There’s also yet another “Invicta” logo and emblem that has to go. One could argue that all these markings could stay, as this is after all just an homage, but we watch enthusiasts do not want to be constantly reminded of the company that we love to hate.
Removing the bracelet is done using a very small screwdriver to compress one end of the spring bar, pulling slightly on the bracelet to keep it from popping back into the lug hole, compressing the other end, and then pulling the bracelet straight away from the watch.
The screw-on case back also features an “Invicta” engraving, and a transparent window revealing the movement and its “Invicta” labelled winding rotor. I decided I’d leave both of these alone since they are not visible when the watch is being worn. I didn’t want to risk damage to the case back crystal or movement by removing these markings.
The proper tool for removing this style of case back is an adjustable 3-prong case back opener, but I’ve found that a metal caliper with a locking screw is just as effective. As long as it is adjusted to fit exactly, it will not damage either the watch or the caliper.
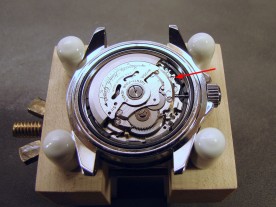
Removing the winding stem is done by first unscrewing the crown, pushing and holding the stem release button (shown by a red arrow in the image above) with a pin, and pulling the stem out. The crown must be in the winding position to do this. In fact, the stem release button is covered if the crown is in the date or time setting position.
The generally accepted way to remove a watch bezel is to slide a case knife between the bezel and case, and gently pry it up until it pops off. This has worked for me with my Vostok Generalskie, and it apparently works with Rolex Submariners too. But I have read mixed reports of success using this technique on Invictas.
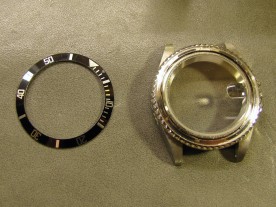
I removed the bezel insert by sliding two knife blades under it, revealing the bezel retaining spring.
What I did instead was to slide a hobby knife blade into the gap between the bezel insert and crystal, and then very carefully lifted the insert slightly. This made it possible to slide a second blade under the outside edge of the bezel insert. I was then able to move the blades around the entire insert, lifting it off without bending or breaking it.
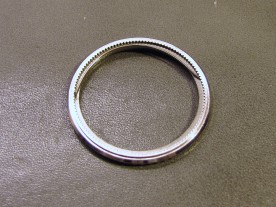
Once the bezel insert is off, the octagonal bezel retaining spring is visible. Using a dental pick, watchmaker’s tweezers, or other fine implement, the spring can be lifted from one end, and carefully teased out from between the bezel and case. After that, the bezel just lifts right off.
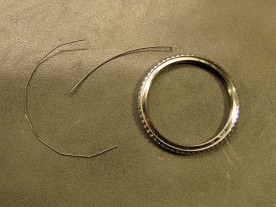
There is a second wire spring underneath the bezel which produces the one way ratcheting action of the bezel. This will likely fall or jump out when the bezel is lifted.
It occurred to me that success in simply prying the bezel off might depend on where one is prying. Prying from the side where the retaining spring is open will probably work well, whereas prying from the opposite side might never succeed. Unfortunately, with the bezel insert in place, there is no way to know the current position of the retaining spring.
Replacing the Dial and Hands
Once I had the movement out, I placed it in a movement holder in preparation for removing the hands and dial. The outer rim of this movement is made of plastic, so one must be careful to not clamp it too tightly.
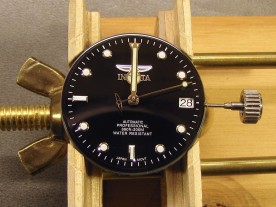
Before removing the hands, I reinstalled the crown and stem so that I could set the time to 12 midnight. Even though the new dial has no date window, I decided to keep the correct alignment of the hands relative to the date change.
To remove the hands, I used an inexpensive hand puller, protecting the dial with a notched piece of thin paper in case I ever want to reuse the dial. I pulled on the hour hand, removing all three hands at once.
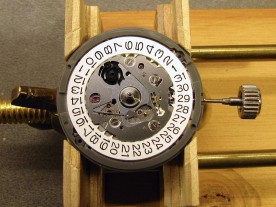
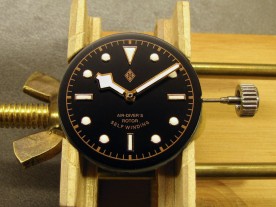
Unlike other movements I’ve worked on, the NH35A does not have screws to hold the dial feet. Instead, the dial feet are just a friction fit into the plastic outer ring of the movement, and the dial could just be lifted right off.
- With the hands removed, the dial can just be lifted off.
- I considered removing the date mechanism, but decided to leave well enough alone.
I briefly considered removing the date disk and the wheels and levers that operate it, thus reducing load on the movement and perhaps slightly increasing its power reserve. I eventually decided against this, as I didn’t want to risk damaging the movement. These movements cannot be easily purchased directly, so the only way to get another one would be to buy another watch.
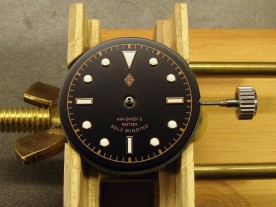
- The Dagaz BB Tribute dial for Seiko watches fits exactly, dial feet and all.
- First I installed the hour hand, aligned exactly to 12 o'clock.
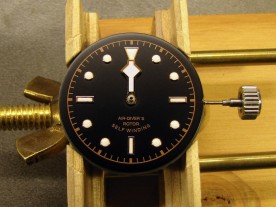
The replacement dial from Dagaz Watches really surprised me. It is a very dark brown, and is slightly textured, unlike the glossy black Invicta dial. The indices are enclosed in rose gold coloured frames. The minute index ring and text are printed in a lighter golden brown, and everything was flawless. The dial feet are in exactly the right place, so the new dial just dropped right in. However, the feet were slightly shorter, and the fit was a bit looser than the original dial (which is not a problem once the watch is reassembled).
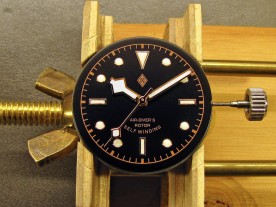
- After installing the minute hand also aligned with 12 o'clock, I used the crown to rotate them out of the way.
- The second hand could be installed anywhere, since the hour and minute hands adjust independently of it.
I installed the rose gold hands, also from Dagaz, one at a time, starting with the hour hand, aligned exactly with 12 o’clock. The minute hand was next, centred over the hour hand. Installing them this way ensured that they were exactly in the right relation to one another.
I then used the crown to set the hands to the 10:10 position in order to move them out of the way while installing the second hand. Alignment of the second hand is not critical, because it remains stationary during setting, and thus can be set to any position relative to the minute hand.
Cyclops Removal (and Crystal Destruction)
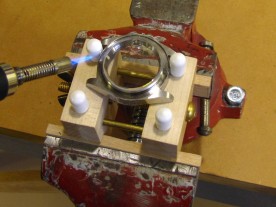
My original plan was to remove the cyclops magnifier from the stock Invicta crystal, and simply leave that crystal in place. The magnifier is glued to the crystal with an adhesive that can be loosened by heat.
Based on the success others have had with this technique, I heated the cyclops with a small butane torch. After a few seconds, I was easily able to push the cyclops off of the crystal. Unfortunately, just before I did that, the Flame Fusion CrystalTM underwent fission. It broke in two, likely due to uneven heating.
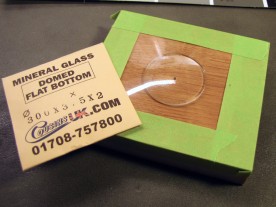
Since I had to replace the crystal anyway, I decided to order a domed one instead of another flat one. The one I ordered was 30mm in diameter, 2.5mm thick at the edges, and about 3.5mm thick in the middle, with a flat bottom. While waiting for that to arrive, I continued with other work on the watch.
Case Modifications
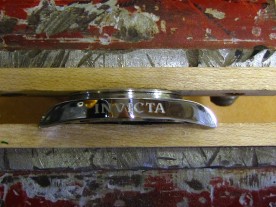
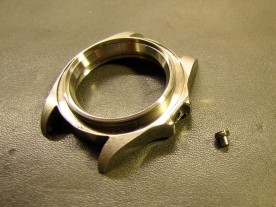
There are two features of the Invicta case that need to be dealt with to make a Black Bay homage: a huge “Invicta” logo etched into the left side of the case, and crown guards on either side of the crown on the right side of the case.
Fortunately, the Invicta’s case is made from stainless steel instead of the chrome plated brass often used in inexpensive watches. This means that arbitrary amounts of material can be filed away and the exposed surface restored to a polished finish.
The “Invicta” logo seems to be etched, rather than engraved, into the case side. As such, it is not very deep, and can be removed without noticeably affecting the size and shape of the case.
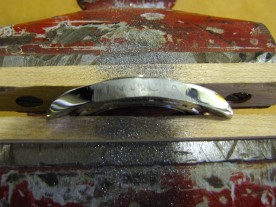
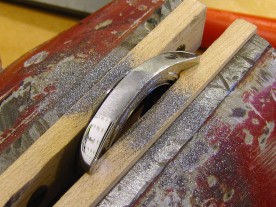
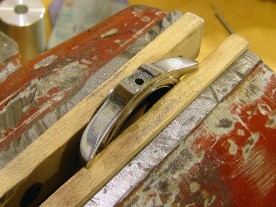
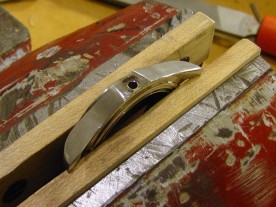
I began by making a set of hard maple jaws for my vice, so that the case could be clamped without scratching it. Filing off the logo while holding the case in one hand is possible, but this makes it hard to avoid giving the case a rounded profile. With the case securely clamped, it is easier to keep the file parallel to the surface.
- After a few minutes of filing, the logo is almost gone.
- More filing has removed the logo completely. Time to start sanding.
Removal of the logo was done using a metal file, moving the file in the up-down direction (i.e. perpendicular to the front and back of the case). I filed slightly past the ends of the logo to retain the lug-to-lug curvature of the case side, but not all the way to the lug ends.
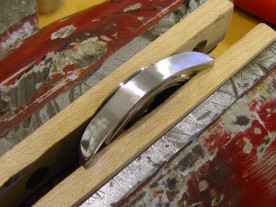
- I removed the coarse filing marks using a fine sanding drum in my drill press.
- This is how it looks after sanding with progressively finer grits up to 4000 Micromesh.
Once the logo was completely gone, the side of the case was obviously quite scratched with filing marks. The next step was too smooth these using sandpaper. I started by using a fine sanding drum in my drill press, sanding in the lug-to-lug direction. After sanding away the filing marks, I sanded lightly from end to end, once again to retain the overall curvature.
This initial sanding simply replaced the vertical filing marks with finer horizontal sanding marks. These were then removed using progressively finer MicroMesh sanding pads, starting with 1500 grit (30µm particle size, approximately equivalent to 320 grit sandpaper), and proceeding all the way to 12000 grit (2µm particle size). Each pad was used at right angles to the previous one, until the marks from the previous stage were removed.
With the logo side of the dial out of the way, it was time to turn my attention to the crown guards. This would require the removal of significantly more material than the logo, and reshaping the case side appropriately.
Before starting, it was necessary to remove the crown tube. From a careful inspection, it appeared that the crown tube was screwed in, but this turned out not to be the case. After trying and failing to pull it out, I was able to push it part way out from inside the case, using the flat end of a drill bit. Once there was a small gap under the threaded portion of the tube, it was easy to pry out using a pair of watchmaker’s tweezers.
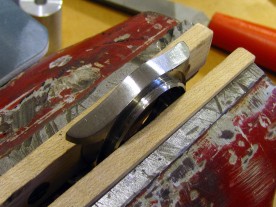
Once again, I used the metal file to remove the majority of the material. I filed the guards all the way down until they were flush with the flat area between them. I then continued filing until the level of the remaining material was about half way down the depression in which the crown tube rests.
This left a very wide flat area, about three times the width of the crown itself. Still using the metal file, I started to remove material from the edge of this plateau, continuing until the plateau was about the same width as the diameter of the crown. As I got close to the desired shape, I switched from the file to a medium grit sanding drum on the drill press, as this allowed me to achieve a slightly concave curve leading up to the plateau.
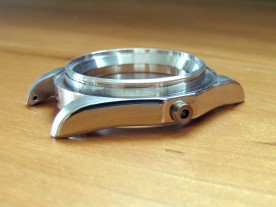
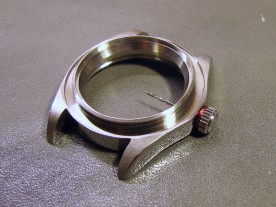
- The guards were filed completely away, leaving just a slight plateau for the crown tube.
- After much polishing using all the Micromesh grits (up to 12000), and then jeweller's rouge, the case is gleaming.
Once I was happy with the shape of the crown plateau, I followed the same sanding steps as I had on the left side of the case, first using a fine sanding drum, and then working my way through all the grits of MicroMesh.
After this, I performed a final polishing with jeweller’s rouge in a cotton buffing wheel, using a Dremel rotary tool. This restored it to its original gleaming finish.
Modifying the Crown
The Tudor Black Bay has an 8mm crown with a fairly low profile. Instead of screwing down snugly against the case, it screws down against a crown tube that is slightly narrower than the crown itself, and coloured red to match the bezel. In order to replicate this in my watch, I would have had to file away more of the case, and fashion a sleeve for the crown tube. However, I was afraid that if I did this, the crown tube would not extend far enough into the case to remain secure. Furthermore, the relatively tall Invicta crown would have looked out of place protruding from this exposed tube.
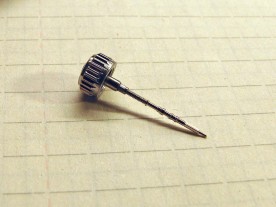
- The crown and a 7mm tube was chucked in the drill so I could file a shoulder on it.
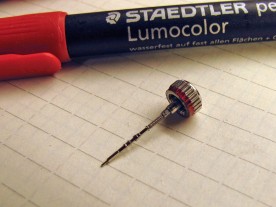
- A red Staedtler marker was almost a perfect match to the red of the bezel.
What I decided to do instead was file a shoulder into the crown itself. With the crown screwed down, this would be nearly indistinguishable from a separate crown tube.
The outside diameter of the crown is 7mm, and I happened to have some 7mm inside diameter aluminum tubing in my model airplane parts box. I cut off a short piece and slid the crown into it, with approximately 1mm protruding. I then chucked this into the drill press.
With the drill running, I could hold a metal file to the exposed portion of the crown, grinding it down in diameter. I decided to grind only as deep as the bottom of the ridges in the crown. This was all a bit nerve wracking, as the winding stem was still attached to the crown, and one slip with the file would likely have destroyed it. I held the file with both hands, resting my arms on the drill press table, and watching closely with my strongest reading glasses.
Once the shoulder was down to the bottom of the ridges, I carefully cleaned off the crown and winding stem using Rodico putty. I used a red Staedtler permanent marker to colour the shoulder, and this proved to be almost a perfect match for the bezel colour. When the ink had dried, I applied a thin coat of water-based (so as not do dissolve the colour) polyurethane varnish to the coloured area.
Diversion – A Crystal Press
For my Omega X-33 homage project, I had constructed a rudimentary crystal press using some blocks of wood and my drill press. This press was only suitable for flat crystals, pressing firmly and evenly to insert a crystal into a gasket placed within a watch case.
Since the Black Bay has a domed crystal, I had ordered a replacement crystal that was also domed. Using a flat press on such a crystal wouldn’t accomplish anything other than producing crushed glass.
Rather than buy a proper crystal press, I pondered how to make an appropriately shaped pushing block that I could use with my existing flat block and drill press. I eventually arrived at the idea of using the crystal itself as a mould to make the required concave surface.
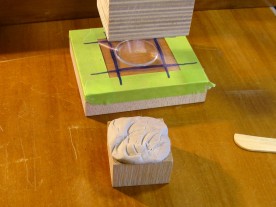
- QuickWood epoxy putty is an ideal material for molding a crystal press.
- After kneading the putty to mix the resin and hardener, it was applied to a small oak block.
I chose QuickWood epoxy putty as the material to be moulded, as I had it on hand from a wood repair project. This material has the consistency of modeling clay when first mixed, but turns rock hard in less than an hour.
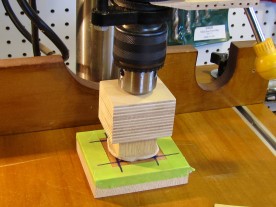
To make the mould, I laid the crystal onto a block of wood, and stretched plastic food wrap over it, taping the edges to the block. This would prevent the crystal from being glued to the putty.
- The block was pressed down onto the covered crystal, and the drill head wedged in place until the epoxy cured.
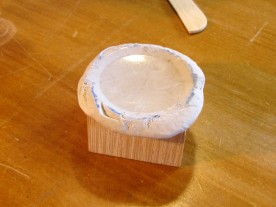
- Here is the the cured press, prior to trimming.
Staring with a small block of solid oak with a cross section slightly larger than the crystal, I mixed up some of the putty and applied it to one face. I placed it face down over the plastic covered crystal, and pressed down slowly with the drill press until the putty started to squeeze out slightly. I then inserted a wedge into the press to hold it down while the putty cured.
Approximately an hour later, I came back, released the press, and took everything apart. At first I could not separate the crystal and plastic film from the putty, and I was afraid that the epoxy had somehow seeped through the film and adhered to the glass. However, a light tap separated them cleanly, and the film just peeled off of the putty.
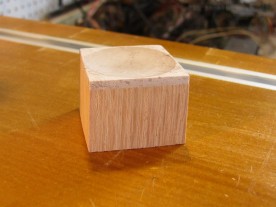
- I sanded the face down to the level of the crystal edges.
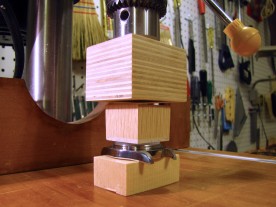
- With a perfectly fitting press, there was no danger of cracking the crystal while pressing it in place.
Next, I sanded the overhanging putty off the sides of the block and sanded the face of the putty down until it was flush with the top edge of the crystal. The intent was that none of the putty protrude below the top of the crystal when pressing down, since the extra material might interfere with other parts of the case, preventing the crystal from being pushed all the way in. I sanded the sides of the block too, until reaching the crystal edge.
With the press completed, installing the crystal was a quick operation. After laying the gasket into the watch case, I placed the crystal and moulded block on top, double checked that the crystal was properly aligned, and pulled down on the drill press lever. Because of the available leverage, very little force was needed to push the crystal home.
Reinstalling the Bezel
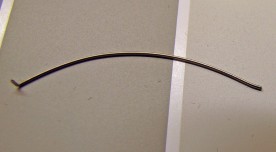
The slight bend at the right hand end of the ratchet wire was straightened slightly to make the bezel easier to turn.
The bezel must be reinstalled on the watch before the insert can be installed in the bezel, otherwise there is no way to install the bezel retaining spring.
The bezel on this watch is a 120-step unidirectional one, meaning that it can only be turned counter-clockwise, in half-minute increments. A simple spring wire, illustrated at right, performs both functions. The end of the wire with a 90° bend fits into a hole in the watch case, while the other end rides along the toothed inner edge of the bezel. When turning the bezel one way, this free end rides up and over each tooth. Attempting to turn it the other way causes the teeth to push against the end of the wire, preventing rotation.
There is a very slight bend in the free end of the wire which controls how hard it is to turn the bezel. This seems to vary from one watch to the next, ranging from far-too-easy to almost-impossible. Slightly straightening this bend makes the bezel easier to turn, while making it sharper makes it harder to turn.
- Placing the ratchet spring into the bezel first makes it easy to reinstall the bezel. Wear eye protection!
- With the bezel in place, the retaining spring could be reinserted using tweezers.
To reinstall the bezel, I wedged the ratchet spring wire into the teeth. I had to try a few times before I found a position from which the spring wouldn’t immediately jump out. After that, it was easy to turn the bezel over, insert the other end of the spring into the hole in the watch case, and lower the bezel into place.
Reinstalling the retaining spring is the reverse of taking it out. I first inserted one end between the case and bezel, holding the bezel down since the spring tended to lift the bezel up. Using a pair of tweezers, I then pushed one segment after another into the gap. Once about half the spring was in place, the bezel stayed down on its own. To get the end of the last segment in, I used the tweezers to guide it, and pushed down with the end of a toothpick.
Preparing and Installing the Bezel Insert
I ordered a replacement bezel insert from a seller on eBay. The size of the insert used by the Invicta is almost the same as that on an actual modern Rolex Submariner (16808). I found a seller who carried an appropriate aftermarket bezel in red.
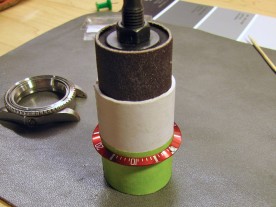
The Rolex-compatible insert was 0.3mm too large. Mounted on a sanding drum, I was able to file it down on the drill press.
I have never seen a Tudor Black Bay in person, but from the pictures I’ve seen, and the reviews I’ve read, the bezel is a very deep burgundy colour (which is apparently based on the colour of a faded vintage bezel in the Tudor museum). The insert I purchased is a slightly brighter red (I think), but still with a hint of burgundy.
The Rolex insert was a tiny bit too large, being about 37.8mm while the opening in the Invicta bezel was only 37.5mm. To reduce the insert to size, I wrapped a cardboard tube and some masking tape around a sanding drum, over which the insert was a snug fit. I then spun this in the drill press and used fine sandpaper to reduce the diameter, measuring frequently with a digital caliper.
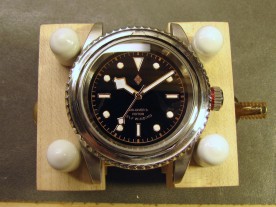
Before installing the new insert, I reinstalled the movement into the case so that I could align the bezel markings with the dial. This took longer than expected, because despite careful cleaning with Rodico putty to remove dust specks from the dial and the back of the crystal, some managed to find their way in. After the third or fourth attempt, it finally stayed clean.
The original sloped Invicta bezel insert was made of very thin aluminum, and was held in the bezel by some kind of glue, adhering to a sloped shelf running around the inside of the bezel. The new bezel was sloped on top, but the outer two-thirds was flat on the bottom, making it much more rigid (as it is designed to snap into a Rolex bezel). This also meant that it sat very slightly high, on the inner edge of the Invicta bezel’s shelf.
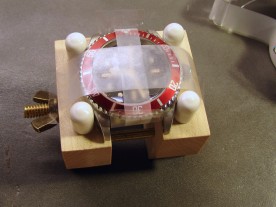
After applying a VERY small bead of epoxy on the bezel's "shelf", the bezel was positioned, and then taped in place.
To hold it in place on this very narrow contact surface, I used T-88 epoxy. This is an epoxy used for boat and aircraft building, and remains slightly flexible when cured. I mixed up a single drop each of the two parts (resin and hardener), and then used a toothpick to apply about 1/50th of this to the bezel shelf, near but not up to the raised inner edge. I did not want to risk any of the epoxy running down between the bezel and case!
I then lowered the bezel insert carefully into position, rotating it back and forth slightly to ensure that any squeeze-out would be distributed around the top edge of the shelf, filling in gaps where I may have applied less epoxy. Once the insert was fully seated, I rotated it until the markings lined up with those on the dial. Then I taped it down with low-tack tape and let the epoxy cure overnight. Do not be tempted to use 5-minute epoxy for a job like this; it cures quickly, but is extremely brittle when cured.
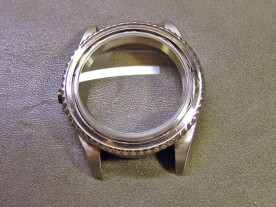
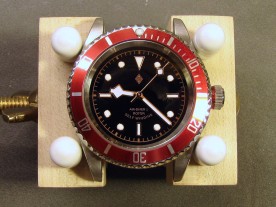
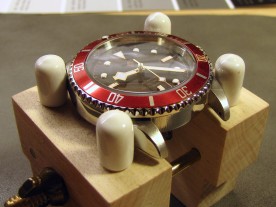
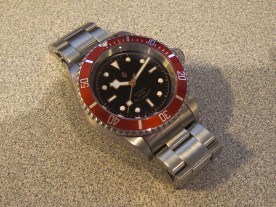
- The completed watch head looks very nice!
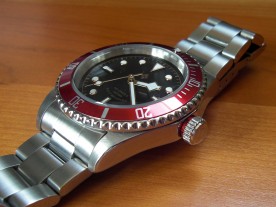
- The domed crystal suits the bezel insert, and is a big aesthetic improvement over the original flat crystal.
With the bezel insert installed, the watch head was complete. However, I could not bring myself to install it on the bracelet without first cleaning that up too.
Modifying the Bracelet
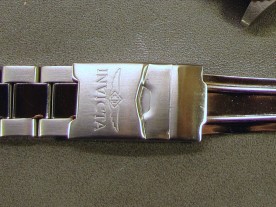
The “Invicta” logo on the bracelet clasp is stamped in, unlike the etched logo on the watch case. It seemed to be slightly deeper, but the clasp material is more than thick enough to allow the logo to be removed.
- The logo on the clasp is stamped in, but fortunately is not very deep.
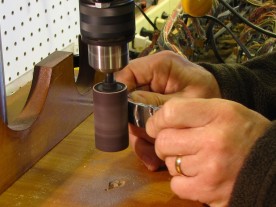
- I used two sanding drums, medium and then fine, to remove the logo from the clasp.
I started with a metal file like I had done with the watch case, but found that it wasn’t very effective. Due to the relatively wide flat area of the clasp, I found that I was primarily filing the edges as the file rocked ever so slightly while moving it back and forth. I decided to try using only the sanding drums, and this worked quite well. To avoid sanding a depression into the clasp, I made a point of moving the clasp back and forth on the sanding drum so that I was not sanding only where the logo was.
After every last trace of the logo was gone from the outside of the clasp (it is still visible on the inside, as the stamping process simply displaces metal instead of removing it), I ran the clasp back and forth on a green (coarse) Scotchbrite pad to smooth out the sanding marks and produce a brushed finish matching the original.
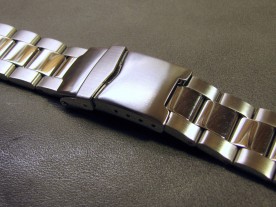
The bracelet itself also received the brushing treatment, as Invicta delivers it with polished link centres, whereas the Tudor bracelet is fully brushed. I found that the easiest way to do this was to attach each bracelet half in turn to a block of wood using double sided carpet tape, and then run that back and forth on the Scotchbrite pad, just like I had done with the clasp. The pad is flexible enough that it reaches into the gaps between the links, brushing there too.
All Done!
This was my first mechanical watch modding project, and I’m extremely happy with the result. Because of the setback of the broken crystal, I was forced to wait to finish it. I used some of that extra time to make modifications that I hadn’t originally intended, filing off the crown guards and removing the logo from the bracelet.
- The bracelet itself was brushed too, and then reinstalled on the watch. Ready to wear!
- The faux crown-tube really goes well with the bezel.
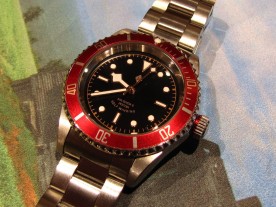
- Dagaz' BB Tribute dial is quite detailed, with gilt indices, and a textured almost-black finish.
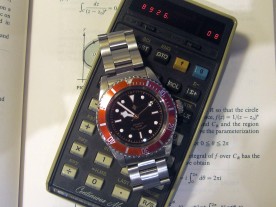
- An homage to an homage to a vintage watch, on a vintage calculator (an HP-25C from 1977).
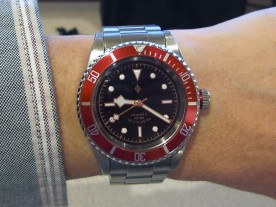
- At 40mm in diameter, the Black Lagoon is at the upper limit of what I can wear comfortably.
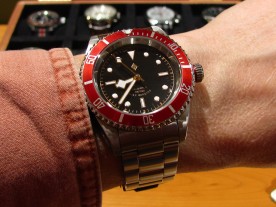
- The Black Lagoon with my collection of Russian watches in the background.
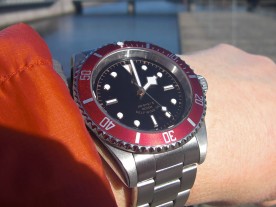
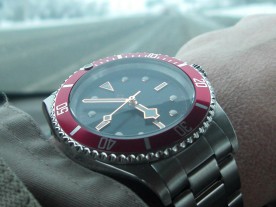
- Bright sun on a cool day in Malmö really makes this watch pop!
- Overcast late afternoon light really highlights the gilt hands and indices.
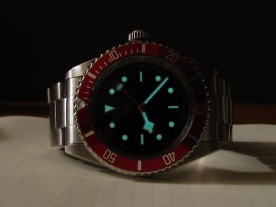
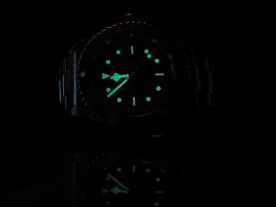
The dial and hands from Dagaz watches were a pleasant surprise. Not only were they extremely well made, but I was happy to find that the lume was quite bright and long lasting. If charged under a lamp before bed, the lume is still visible in the morning.
- When freshly charged, the lume on the Dagaz dial and hands is very bright.
- The lume starts out bright, and remains visible to dark-adapted eyes all night.
I would probably never have undertaken this project if it weren’t for Watchuseek users spacetimefabric, jelliottz, and digivandig, all of whose own Black Bay homage projects inspired mine, and all of whom answered my questions quickly and enthusiastically.
Related Articles
If you've found this article useful, you may also be interested in:

If you've found this article useful, consider leaving a donation in Stefan's memory to help support stefanv.com
Disclaimer: Although every effort has been made to ensure accuracy and reliability, the information on this web page is presented without warranty of any kind, and Stefan Vorkoetter assumes no liability for direct or consequential damages caused by its use. It is up to you, the reader, to determine the suitability of, and assume responsibility for, the use of this information. Links to Amazon.com merchandise are provided in association with Amazon.com. Links to eBay searches are provided in association with the eBay partner network.
Copyright: All materials on this web site, including the text, images, and mark-up, are Copyright © 2026 by Stefan Vorkoetter unless otherwise noted. All rights reserved. Unauthorized duplication prohibited. You may link to this site or pages within it, but you may not link directly to images on this site, and you may not copy any material from this site to another web site or other publication without express written permission. You may make copies for your own personal use.


Fred
June 03, 2014
Well done on my favourite watch!!
Excellent tutorial!
Aaron
July 07, 2014
you are my hero.it may not fool the most ardent of fans, but to say you did it yourself makes it even cooler.
Stefan Vorkoetter
July 10, 2014
Thanks Aaron, but the watch isn’t intended to fool anyone. I just liked the style of the Black Bay and wanted something like it at a much lower price point.
Terence
July 28, 2014
Great detailed mod!! Thanks for sharing.
Does the 2.5mm domed crystal flush with the bezel insert or just alittle higher? Any side photos to see the effect? Many thanks!
Pedro
August 06, 2014
Amazing! When I grow up I want to be like you! =D
Seriously, I want to repair/modify my own watches. Where can I get this Black Lagoon? I looking for a Tudor homage.
Thank you!
Stefan Vorkoetter
August 07, 2014
Pedro, to get a Black Lagoon, you have to make it yourself.
Trip
September 14, 2014
Nice post. I have a Tudor submariner homage made from the 8926OB and Dagaz parts (I wanted to model it after the model distributed to the French Navy). However, I didn’t go through the process of removing the cyclops (the dial I got has a date window) or the Invicta logo on the side. You dedication to doing it correctly is impressive.
Darren
October 11, 2014
Inspired me to do my own, currenty working on a blue black bay homage 🙂
Stefan Vorkoetter
October 11, 2014
Send me some pictures when it’s done and I’ll share them here if you’d like.
Darren
October 21, 2014
Sure thing. It’s currently in pieces. Waiting on funds to buy the dial and source a bezel insert in the right shade of blue (midnight blue) but I have been taking pictures along the way
Tom Adams
January 11, 2015
I am really impressed with your attention to detail, particularly how well the crown turned out. I am currently working on a similar project and am curious where you sourced the crystal from. Also, did the permanent marker on the crown stand up, or so you have to touch it up occasionally?
Stefan Vorkoetter
January 12, 2015
I needed to touch it up a few times. Then, I tried paint instead. I used Testor’s dark transparent red, straight from the bottle, applied with a single hair brush. Normally one uses diluted paint for things like hands, but I had tried that earlier, and the paint wicked up the grooves in the crown; I couldn’t keep it where I wanted it. The paint has held up better than the marker.
Neil woods
February 24, 2015
Hello, love the watch. I was curious as to what you would charge for your time for creating this watch for me. Is buy all the parts and have you install them and such. Just curious. Thanks
Stefan Vorkoetter
February 27, 2015
Thanks Neil. Currently, I’m not doing custom watch mods, as I don’t have a huge amount of time to spend on these, and I have a long list of my own projects I’d like to carry out. I’d suggest joining the WatchUSeek forums and contacting user jelliottz.
Richie
February 28, 2015
Hi, fantastic homage build.
I wish I had A, the talent and B, the time to undertake a build like this my self. Which brings me to my next question, would you consider building one on commission?
Many thanks Richie
Stefan Vorkoetter
February 28, 2015
At the moment, sorry, no. See my reply to the previous comment.
zshiun
May 05, 2015
If the bezel is changed as well, then it would definetly a complete mod.
I like your work.
Tom
May 20, 2015
Hey do you know if the bezels made for Seiko watches would fit the Invicta case? I screwed mine up being an idiot trying to pry it off and am, without success, looking for a replacement. Thanks in advance!
Stefan Vorkoetter
May 20, 2015
No, the Seiko bezel inserts won’t fit. You need one that fits a Rolex 16800.
Elliot
September 15, 2015
I’m curious where you found a replacement crystal. Mine broke weeks ago on my Invicta 8926 and I can’t find a replacement, flat or dome. (If I’m replacing the darn thing I might as well get dome.) thanks for any help you can give.
Stefan Vorkoetter
September 16, 2015
I got mine at Esslinger. Cousins in the UK would have them too.
Elliot
September 17, 2015
Thanks Stefan, I noticed after commenting the Cousins label on your crystal package. I haven’t heard of Esslinger though, so thanks for the info!
WearySky
October 07, 2015
This was a truly impressive job. I’m not particularly a watch guy, but I’m always fascinated by in-depth projects like this regardless of what they’re for. Great work!
STARK Gunn
November 13, 2015
Thanks for your generous explanation and in sharing this incredible project.
J.Rosales
November 21, 2015
Hi Stefan, can you help me do My Seiko skx031 make it look like your watch.. Thanks
Stefan Vorkoetter
November 23, 2015
The SKX031 should be fairly easy to convert. Just buy the appropriate dial, hands, and bezel insert from Dagaz watches. They should all fit the Seiko as-is.
John
November 25, 2015
Truly wonderful work. You are a craftsmen.
Arsalan Baig
December 03, 2015
Hey Stefan,
Great build, I was wondering if you could explain what you meant by filing a shoulder into the crown? I’m going to attempt to replicate your handiwork as much as I can.
Stefan Vorkoetter
December 03, 2015
The edge of the crown closest to the watch was filed down to make a narrower area (a “neck” if you will). Compare the crown in the shoulder photo with an earlier photo (like one of the movement photos).
Robin
January 18, 2016
Hey Stef,
Great mod, and it’s served as an inspiration and a guide to various folks over at the Watchuseek forums!
Was wondering if you used the original gasket? And I notice you ordered a 30mm crystal, which is exactly the same size as the original crystal. Did you manage to fit it in fine?
Also, the dial; I realise Dagaz lists them as 28.5mm. I measured the dial on my 8926 and it’s about 27mm? Everyone else is saying the Dagaz dials fit their 8926’s fine though.
Stefan Vorkoetter
January 18, 2016
Yes, I used the original gasket, and the new crystal goes in just fine (using the press I made as described).
I have a few 8926OB dials in my drawer (I bought them from a fellow WUS member as a source of indices for other projects), and just measured a few of them. They’re all exactly 28.5mm. How did you measure yours?
Roland
May 30, 2016
Well done Stefan……I’m impressed !
I do have the original Rolex Submariner which I bought in 1992. Knowing what I know now, I will never buy a Rolex again. A lot of expensive fluff to buy AND to maintain. So, well done with your own homage to the Black Bay !!
Actually, the Vostok Amphibian #120 case isn’t that far off the Rolex Submariner case either…… and it’s watertight to 200 mtr !
Joma
June 28, 2016
Very impressive! You made it seem so easy!
Ben
May 02, 2017
What a great tutorial !!! Want to do that too but im scared that i cant handle that in perfection like you. Great work and beautiful watch and work. (sorry 4 my english, i’m german)
Greetz from Cologne,
Ben
Nathan F
May 18, 2017
Excellent guide and tutorial, I’ve been looking for a Black Bay mod guide or even a decent homage watch for a little while and I have most of the stuff to try this myself.
I’m less thrilled about the crown guard removal, but I may be tempted to leave those in situ.
Looks like, I’ll be ordering an 8926OB at the end of the month… That or a Tiger Concept but I’m a sucker for a glass caseback even if the movement isn’t decorated.
Richard
March 18, 2018
This is a fantastic write up and has inspired me to modify my Invicta, i will most likely break mine but i will definitely be using this guide for reference!
Thank you!
Aditya
September 07, 2018
Wow. I learnt so much from this. Thank you very much sir. Kudos
Javier
March 18, 2019
Stefan, you’re brilliant. Congratulations. Where are you from? I’m very impressed by your talent, creativity, craftsmanship, level of detail, resourcefulness and taste. I’m in Toronto, Canada. If I had a friend/neighbour like you I’d be helping you in the shop whenever I can. Cheers, Javier
PS: I’d also see whether you’d sell me the black lagoon…
Stefan Vorkoetter
March 18, 2019
Thanks for the kind words Javier. I live near Waterloo. I’ll have to think about whether I’d want to sell the Black Lagoon. 🙂
Danny Larcade
March 25, 2019
Beautiful just Beautiful. I have a Grand Diver and for 2 days now I have been having hell trying to get that spring back into place. Could you possibly post a video on how to do that?
Spezi Matik
August 03, 2019
Cool, really good work done!
István Bisz
August 10, 2019
Good job! Thank You for sharing!